Ok, first things first: ALWAYS remember to take before pictures of your projects. For some reason, I always forget until I am well into the project and then I can't look back and see the transformation!
DESK
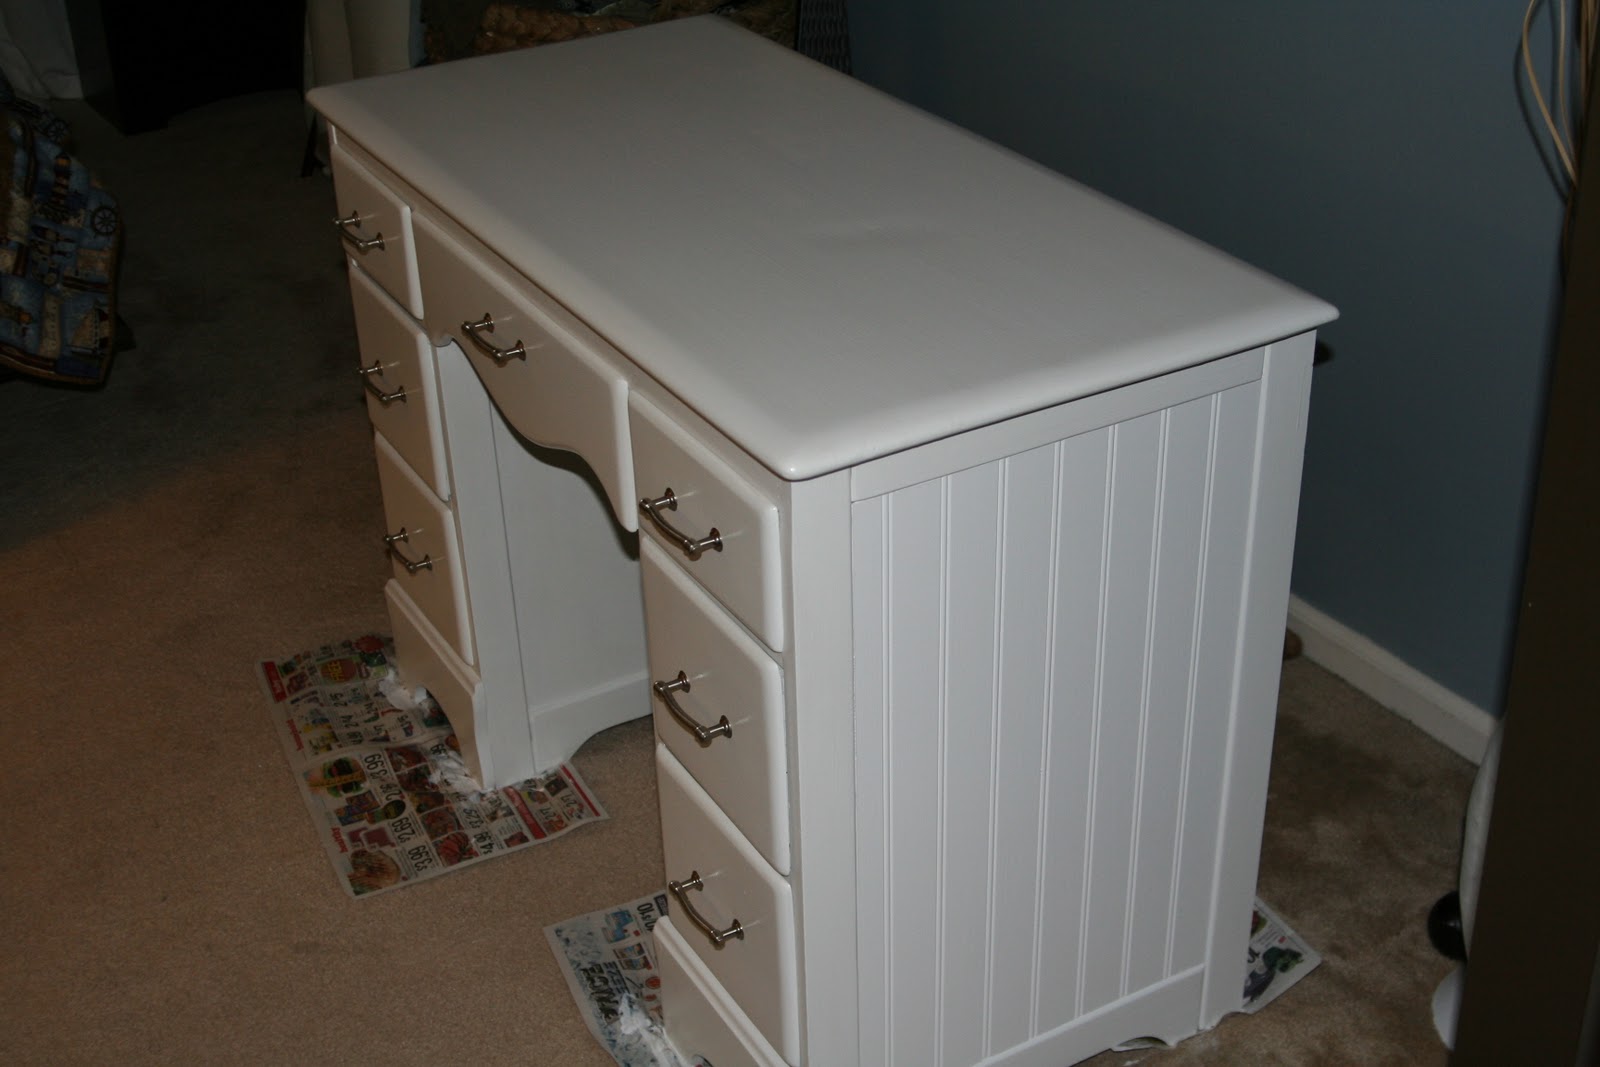
So, this is the story of a desk I bought at Impact thrift store (I LOVE THRIFT STORES) for less than $40. The key is to make sure it's a quality piece. This one's solid wood :). When I bought it, it was stained very dark, and was pretty beat up on the top. The handles were those back-plated brassy-gold floppy handle type things that were definately NOT my style.... (this is my effort to give you a picture of the true 'before'). Below is after I painted the thing with primer. Already a big difference.

Here is the true 'after'. Glossy white paint made it instantly way prettier, and the handles make all the difference! These were tricky because when I took the old handles off, I found that additional holes had been drilled to a different size, so to cover all the holes, I needed something that had a wide base. I lucked out with these beauties from Home Depot. You have to be careful though, hardware can add up! It was about $20 for these. Still, $60 for this desk is a steal I'd say :).

This is my favorite part. The sides of the 'before' desk were trimmed out, and I love wainscotting, so I got a small piece and inset it into both sides of the desk. It ended up being the perfect depth. LOVE it! All I did was measure the 'hole', used our circular saw to cut it to size (and after sanding it a bit, it did) then used some liquid nails to keep it in place. It gives it much more of a fresh, coastal feel.
BOOKMARKS
This was just a side project. I found this pack of scrapbooking paper (I don't scrapbook, but there is some beautiful paper out there!) at TJmaxx. So many patterns that were just so pretty! Right now, I keep my place in my books with tissues, torn pieces of paper, or the like, so bookmarks seemed like a pretty cool way to use these. I have a paper cutter, so I just decided on the size I wanted, used a small hole punch on the top, and fit some thick thread through the hole (thread which I got at Goodwill for $.50!). Make sure to use medium to heavy weighted paper. I think they are super cool. I also have some different patterns listed for sale on etsy.... ;)

CANDLE HOLDER
Again, I failed to take a before photo of this candle holder... ugh. It started bright red. I don't have anything against red, it's just not me, and for $.25 at the Care and Share, I had an idea for this candle holder. I used some leftover spraypaint I had to give this candle holder a base color (just to help in case you could see through the pieces of jute). Then I just used hot glue to wind the jute onto it.

I love how it turned out!

Start at the middle of the top (I think I made the bottom the top) and it gives a pretty cool affect.

Below is a photo of it on display :) The framed 'art' is just an old frame I painted white and put some of the scrapbooking paper in (Another cool, cheap, pretty way to add pattern or color!)

These are all some current projects I've completed. I have more in progress. Thanks for reading! Hope you were inspired in some way!
No comments:
Post a Comment